Module | z Tooth count GR | VDB | b1 Tooth width | b2 | d1 | d2 Pitch circle Ø | d3 | d4 Pre-bored hole | d5 | Max. torque in Nm |
---|---|---|---|---|---|---|---|---|---|---|
1.5 | 12 | 12 | 0.67 | 1.18 | 0.83 | 0.71 | 0.55 | 0.20 | - | 6.8 |
1.5 | 14 | - | 0.67 | 1.18 | 0.94 | 0.83 | 0.63 | 0.20 | - | 8 |
1.5 | 15 | 15 | 0.67 | 1.18 | 1.00 | 0.89 | 0.71 | 0.20 | - | 8.5 |
1.5 | 16 | - | 0.67 | 1.18 | 1.06 | 0.94 | 0.71 | 0.20 | - | 9.1 |
1.5 | 18 | 18 | 0.67 | 1.18 | 1.18 | 1.06 | 0.79 | 0.24 | - | 10.3 |
1.5 | 20 | 20 | 0.67 | 1.18 | 1.30 | 1.18 | 0.98 | 0.31 | - | 11.4 |
1.5 | 21 | - | 0.67 | 1.18 | 1.36 | 1.24 | 0.98 | 0.31 | - | 12 |
1.5 | 22 | - | 0.67 | 1.18 | 1.42 | 1.30 | 1.10 | 0.31 | - | 12.5 |
1.5 | 24 | 24 | 0.67 | 1.18 | 1.54 | 1.42 | 1.10 | 0.31 | - | 13.7 |
1.5 | 25 | - | 0.67 | 1.18 | 1.59 | 1.48 | 1.18 | 0.31 | - | 14.2 |
1.5 | 26 | - | 0.67 | 1.18 | 1.65 | 1.54 | 1.18 | 0.31 | - | 14.8 |
1.5 | 28 | - | 0.67 | 1.18 | 1.77 | 1.65 | 1.18 | 0.31 | - | 16 |
1.5 | 30 | 30 | 0.67 | 1.18 | 1.89 | 1.77 | 1.38 | 0.47 | - | 17.1 |
1.5 | 32 | - | 0.67 | 1.18 | 2.01 | 1.89 | 1.38 | 0.47 | - | 18.2 |
1.5 | 33 | - | 0.67 | 1.18 | 2.07 | 1.95 | 1.38 | 0.47 | - | 18.8 |
1.5 | 34 | - | 0.67 | 1.18 | 2.13 | 2.01 | 1.38 | 0.47 | - | 19.4 |
1.5 | 35 | - | 0.67 | 1.18 | 2.19 | 2.07 | 1.38 | 0.47 | - | 19.9 |
1.5 | 36 | 36 | 0.67 | 1.18 | 2.24 | 2.13 | 1.38 | 0.47 | - | 20.5 |
1.5 | 38 | - | 0.67 | 1.18 | 2.36 | 2.24 | 1.38 | 0.63 | 1.65 | 21.7 |
1.5 | 39 | - | 0.67 | 1.18 | 2.42 | 2.30 | 1.38 | 0.63 | 1.65 | 22.2 |
1.5 | 40 | 40 | 0.67 | 1.18 | 2.48 | 2.36 | 1.57 | 0.63 | 1.89 | 22.8 |
1.5 | 42 | - | 0.67 | 1.18 | 2.60 | 2.48 | 1.77 | 0.63 | 2.09 | 23.9 |
1.5 | 44 | - | 0.67 | 1.18 | 2.72 | 2.60 | 1.77 | 0.63 | 2.09 | 25.1 |
1.5 | 45 | - | 0.67 | 1.18 | 2.78 | 2.66 | 1.77 | 0.63 | 2.09 | 25.6 |
1.5 | 46 | - | 0.67 | 1.18 | 2.83 | 2.72 | 1.77 | 0.63 | 2.09 | 26.2 |
1.5 | 48 | 48 | 0.67 | 1.18 | 2.95 | 2.83 | 1.77 | 0.63 | 2.09 | 27.4 |
1.5 | 50 | - | 0.67 | 1.18 | 3.07 | 2.95 | 1.77 | 0.63 | 2.09 | 28.5 |
1.5 | 51 | - | 0.67 | 1.18 | 3.13 | 3.01 | 1.97 | 0.79 | 2.48 | 29.1 |
1.5 | 52 | - | 0.67 | 1.18 | 3.19 | 3.07 | 1.97 | 0.79 | 2.48 | 29.6 |
1.5 | 54 | - | 0.67 | 1.18 | 3.31 | 3.19 | 1.97 | 0.79 | 2.48 | 30.8 |
1.5 | 55 | - | 0.67 | 1.18 | 3.37 | 3.25 | 1.97 | 0.79 | 2.48 | 31.3 |
1.5 | 60 | - | 0.67 | 1.18 | 3.66 | 3.54 | 2.17 | 0.79 | 2.87 | 34.2 |
1.5 | 65 | - | 0.67 | 1.18 | 3.96 | 3.84 | 2.36 | 0.79 | 3.19 | 37 |
1.5 | 70 | - | 0.67 | 1.18 | 4.25 | 4.13 | 2.36 | 0.79 | 3.66 | 39.9 |
1.5 | 75 | - | 0.67 | 1.18 | 4.55 | 4.43 | 2.36 | 0.79 | 3.66 | 42.7 |
1.5 | 80 | - | 0.67 | 1.18 | 4.84 | 4.72 | 2.36 | 0.79 | 4.29 | 45.6 |
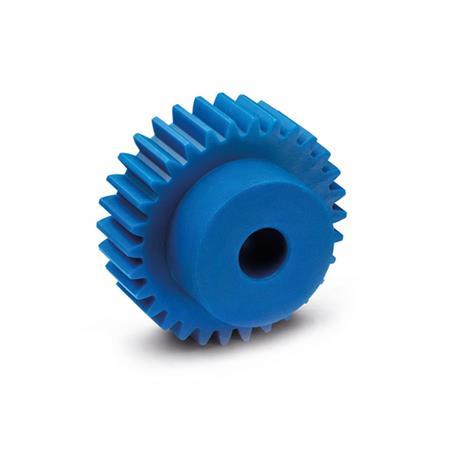
Gears Gears transfer a rotary motion from a driving shaft to a driven shaft via a positive locking. Depending on the ratio of the number of teeth of the gears used, the speed and the torque may be retained, decreased or increased. This is called the gear ratio, where the driven gear is put into relation with the driving gear. The reverse relationship applies to the resulting speeds. See the equations below. Due to the positive locking between the gear pairs, the rotational movement is transmitted precisely and without slippage. A pairing of two or more combined gears is called a gear train or gearbox. The smallest gear is often referred to as the pinion, while the largest is simply called a gear. The driving and the driven gears always rotate in opposite directions. If this is not desired, a third gear must be positioned between them as an idler gear. Gear trains require only small center distances, which can be influenced by the number of teeth selected. |
|||||||||||
Gear ratio i = Speed ratio: i = n1 / n2 |
|||||||||||
The tooth shape, size and geometry can be described based on a trapezoidal reference profile, which corresponds in principle to the profile of a rack. The tooth or trapezoid height is standardized with a module value, which is specified in millimeters. The angle of the symmetrical trapezoid sides is referred to as the pressure angle. The reference profile is mapped onto the individual tooth by rolling over an involute curve along the contact surface. It is only possible to pair gears with the same module and pressure angle. |
|||||||||||
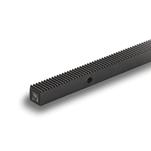
Racks A rack can be considered a segment of a gear with an infinitely large diameter. The teeth of the rack then correspond precisely to the reference profile and have no bent tooth flanks. A combination of a rack and a spur gear allows rotational movements to be converted into linear movements or vice versa. The gear that engages with the rack is called a pinion. Rack drives are used in automation applications with high repeatable precision and frequent changes of direction and load. |
|||||||||||
Rack drives in which the rack remains stationary while the pinion moves along the rack are frequently used in conveyor systems. The reverse case, in which the pinion rotates around a fixed axis while the rack moves, is often used in extrusion systems as well as lifting and forward feed applications. |
|||||||||||
The most important mechanical value for the toothed racks is the maximum force that can be exerted on an individual tooth. |
The following are the generally applicable formulas for the design of spur gears. |
|||||||||||
Module m |
Pitch p |
||||||||||
Tooth count z |
Tooth height h |
||||||||||
Pitch circle Ø d |
Addendum ha |
||||||||||
Addendum circle Ø da |
Dedendum hf |
||||||||||
Root circle Ø df |
Crest clearance c |
||||||||||
Gear ratio i |
|||||||||||
Reference center distance ad |
|||||||||||
Center distance a |
|||||||||||
The following tolerances t must be taken into account for the center distance a: |
The spur gears EN 7802 have involute toothing with a pressure angle of 20°. Only gears with the same with the same module and pressure angle can be paired with each other. The following relationship applies to the involute toothing: |
|||||||||||
The tooth flanks of the gears are shaped as involutes. The tangent that is perpendicular to the line of action runs through the contact point between the two tooth flanks (involutes). The line of action is at a 20° angle to the pitch line of engagement. The pitch point is located on the line of engagement at the intersection between the line of action and the center line of the gear axes. |
|||||||||||
For each gear, a counter gear with an infinitely large pitch diameter can be designed, which has a trapezoidal tooth profile. This reference profile then corresponds precisely to the profile of the rack. |
|||||||||||
Base circle diameter db |
The pitch p on the pitch circle corresponds to the pitch p on the line of engagement. The base pitch pb corresponds to the contact pitch pe. The contact pitch pe is determined by the pitch p and the size of the pressure angle α. |
||||||||||
Base pitch pb |
|||||||||||
Contact pitch pe |
Material specific advantages The gears EN 7802 are made of polyamide and offer the following material-specific advantages:
In addition, gears of steel are frequently overdimensioned for their application. In such cases, polyamide gears are a cost-effective alternative. The spur gears EN 7802 of polyamide are frequently used in the following applications:
|
|||||||||||
Lubrication / maintenance One of the main advantages of the spur gears EN 7802 of plastic is the possibility of using them without lubrication. If lubrication is still required to decrease friction and wear or to increase the lifespan of the gear, lithium-saponified grease with a mineral oil base is recommended. |
|||||||||||
Gear pairing – metal and plastic The spur gears EN 7802 of plastic can also be used in combination with metal gears. With this pairing, the smallest gear (pinion) should be of metal and the larger gear of plastic since the wear on the larger gear is distributed over more teeth, resulting in a longer lifespan. The combination of metal and plastic gears offers additional advantages since metal has a higher thermal conductivity, leading to better heat dissipation during operation and an associated decrease in wear on the plastic gear. |
|||||||||||
Hub machining of plastic gears The following points must be observed when making a bore or keyway:
|
|||||||||||
Torque The torque specifications in the table of the respective standard sheet have been determined through a combination of theoretical calculations and laboratory tests. The empirically determined data has been verified with suitable software, taking into account the VDI 2736 guideline for the design of thermoplastic gears. The test series were ccarried out in continous operation at a speed of 100-150 rpm without lubrication in order to test the most severe conditions. The following assumptions were used for the theoretical calculation:
|
|||||||||||
The tangential force Ft is then correlated with the torque via the pitch circle diameter. The following formula applies to the nominal torque: |
|||||||||||
The torques given in the standard sheet should be considered guide values and may vary based on the specific application situation. Operating conditions such as speed, temperature, pairing of gears of different materials, lubricated or dry operation, etc. have a major influence on the load capacity. |
Min | Max | Price |
---|---|---|
1 | 5 | Can$9.89 |
6 | 49 | Can$9.53 |
50 | 99 | Can$8.99 |
≥ 100 | Can$8.09 |
Our service team is available from Monday to Friday between 8:00 AM and 5:30 PM Eastern Time: 800-397-6993